Planting Cocoyam: See How To Plant Cocoyam
Cocoyam grows well in land with abundant water, it can also be grown using irrigation to supply abundant water.
They can grow under flooded conditions and under tree shades so long as it is the base that is covered by the water.
My grandmother used to plant her cocoyam in deep, moist, swampy areas with tree shades where almost no other plant can grow well.

Description of Cocoyam
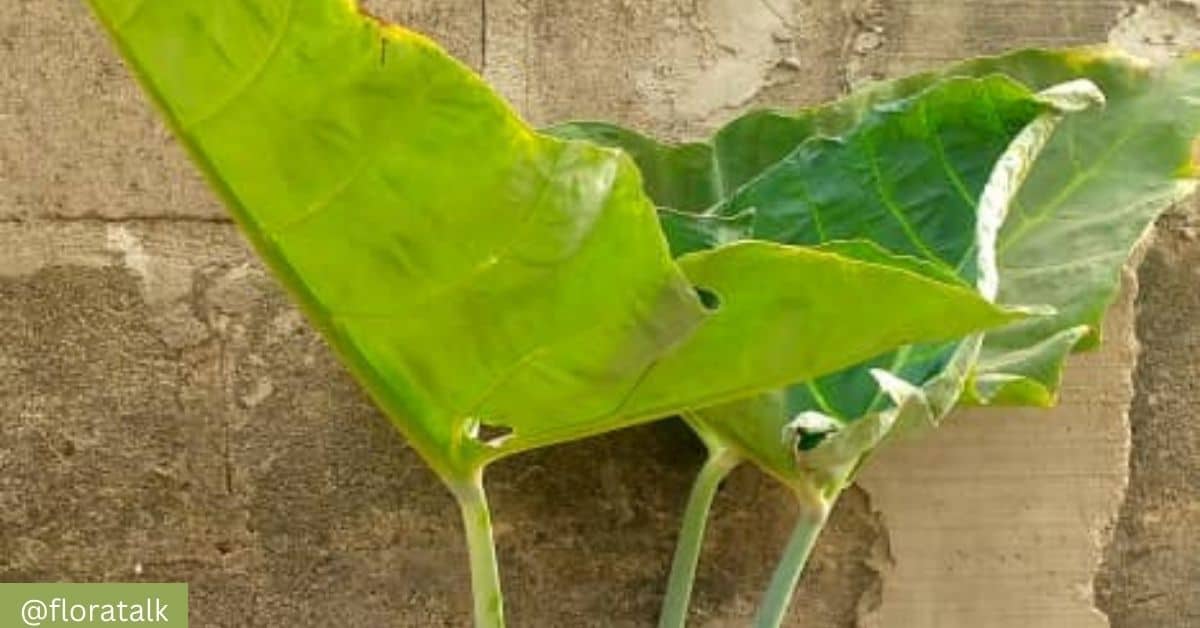
Cocoyam plant has long stalks or petioles with large green heart-shaped leaves.
The leaves, although heart-shaped may vary some are rounded heart-shape, some pointed heart-shape depending on the variety of the cocoyam.
The main edible part of the cocoyam is produced underground, it’s a tuberous root.
The tubers are oblong or rounded in shape.
The outer skin is rough and brownish in colour.
The flesh of the tuber ranges from white to pale yellow or purple, depending on the variety.
Planting Season for Cocoyam
Early planting of cocoyam in the southern region is between March and April and late planting is between July and August.
In the northern region early planting is between May and June and late planting is between July and August.
Steps to Planting Cocoyam
Step 1 – Choose a Location
The first step is to choose a good location for the plant.
In choosing a location have this in mind,
The cocoyam plant does not need so much sunlight,
so you could utilize the space under a tree in your garden.
Ensure you have the right kind of soil (loamy soil),
cocoyam (ede) does well in swampy or flooded areas
Step 2 – Land Clearing and Preparation
Once a location has been decided on, clear the site by removing grasses, shrubs and dirts.
Till the soil at least 20 cm (8 in) to 30 cm (12 in) to loosen the soil this provides a good seedbed and helps the crop penetrate easily.
Step 3 – Seed Selection when Planting Cocoyam
Select good looking tubers for planting
Ensure they are healthy, disease free, without blemish or signs of decay
Make sure the cocoyam is firm
Choose corms that have sprouted buds.
Step 4 – Plant the Seed
Make a hole in the soil about 10 cm (4 inches) deep depending on the size of the corm,
place the corm in and give a spacing of about 30 cm (12 in) to 45cm (18 in) between plants.
Step 5 – Watering
The plant loves water. Make sure to water the plants regularly especially when the rains are absent.
Maturity and Harvest
Maturity is attained between 6 -12 months in dry land and between 12 to 15 months in wetland.
The flooded cultivation yields about double over dry land cultivation.
However, in flooded conditions taro requires longer maturation time.
The crop is harvested when the plants reduce in height and the leaves turn yellow.
In some cases, the leaves are allowed to dry reasonably in dry land cultivation.
Hand tools are used in harvesting cocoyam.
The sand at the base is moved using any suitable tool to avoid cuts on the cocoyam.
It can be done simply by shaking the stem to loosen the sand and then grabby the base of the petisle to pull up the corms.
Global average yield is about 6.2 tonnes per hectare
Storage
After carefully harvesting the tuber and avoiding bruises.
Next is to clean up the tuber, you can wash up with water or just clean out the sand with a cloth
Cleaning without water is recommended as it reduces the moisture content which can lead to spoilage.
Spread out the cocoyam to dry
Select the best
Place in a cool, dry and well ventilated place
Soil Fertility Boosting
Practice crop rotation: This improves the overall fertility of the soil, that is the physical and chemical conditions of the soil.
Use organic matter: this helps the soil to be able to store soil nutrients
Mulching: this helps to reduce weed, improves soil structure and fights soil erosion.
Avoid overcrowding: this helps the plants have the needed amount of nutrients and not compete against each other.
Pest and Diseases
Pest
Aphids: this insect attacks tender young plants, they can cause stunted growth, curling of leaves, and the transmission of viral diseases.
Cocoyam corm weevils: the larves attack the corm they make a hole in the corm causing damage and rotting.
Diseases
Cocoyam tuber rots: this is caused by fungal pathogens some of which are Rhizopus spp., Pythium spp., and Fusarium spp., which causes the tuber to rot.
Taro Leaf Blight (Phytophthora colocasiae): this is a fungal disease that affects the leaves of cocoyam plant, it causes brown or black spots that can spread all around the plant leading to defoliation and reduction in plant vigor.
Cocoyam Mosaic Virus: This viral disease affects cocoyam plants and is transmitted by aphids. Signs include mosaic patterns, yellowing, and distortion of leaves, as well as stunted growth.
Cocoyam Rust (Puccinia colocasiae): This is a fungal disease which causes reddish-brown pustules on the leaves, petioles, and stems of cocoyam plants. It can lead to defoliation and reduced plant vigor.
Pest and Disease Control
To control pest and diseases it requires the combination of several practices and measures they are:
Sanitation: getting rid of infected plants helps prevent the spread of diseases in your garden.
Healthy seed: when cultivating if you use a healthy cocoyam corm this helps to prevent the introduction of disease into the garden.
Crop rotation: do not plant cocoyam in the same place every planting season; this helps to stop the life cycle of pests and diseases in a particular place, thereby stopping their build up in the soil.
Timely harvest: harvest cocoyam on time to prevent spoilage and reduce the risk of post harvest disease.
Regular monitoring: monitoring the plant regularly helps you take note earlier of any problem and that way you are able to stop it before it gets bad.
Is the information above sufficient enough to help you plant cocoyam in your garden, let us know in the comment box below?