How to Plant Mulberry in Nigeria: A Complete Guide
Mulberry (Morus spp.) is a versatile and valuable plant that can thrive in many regions across Nigeria.
Its sweet, nutritious berries and fast-growing nature make it ideal for home gardens, small farms, and agro-processing ventures.
Beyond fruit, mulberry leaves are used in livestock feed and even sericulture (silk farming), making it a multi-use crop.

This guide offers a comprehensive step-by-step breakdown on how to successfully plant, manage, and harvest mulberry in Nigeria’s tropical climate.
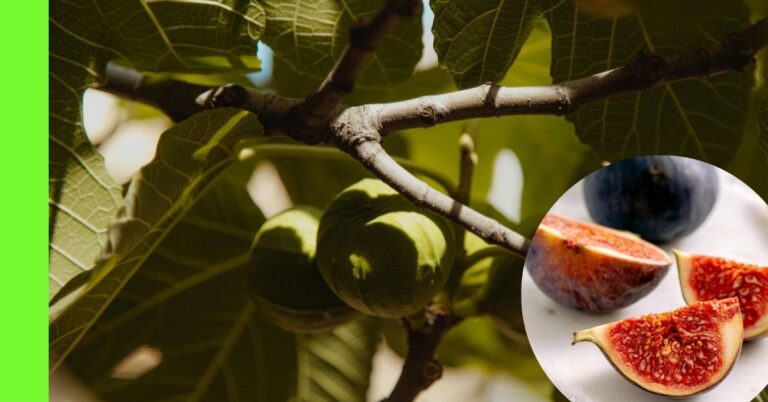
Description of a Mulberry Plant
The mulberry plant is a fast-growing, medium-sized deciduous tree or shrub, typically reaching a height of 3 to 10 meters, depending on the species and environmental conditions.
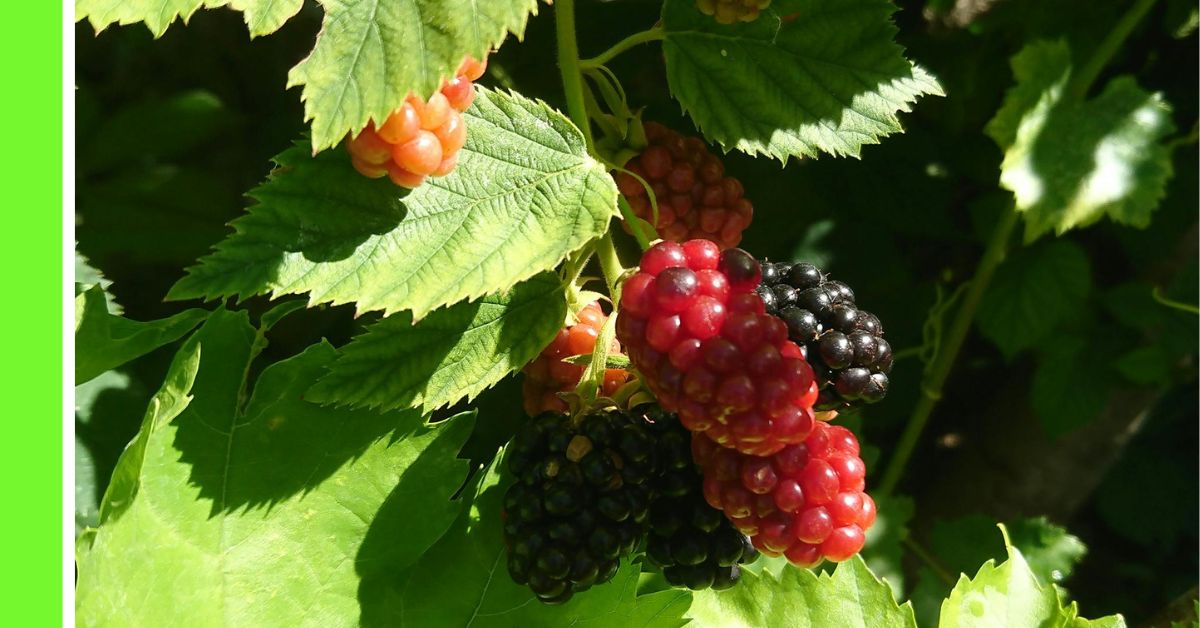
It belongs to the Moraceae family and bears small, colourful aggregate fruits that resemble elongated blackberries.
The fruits may be red, purple, white, or black, depending on the variety.
The leaves are simple, alternate, and broadly ovate with serrated edges.
These leaves are not only used for feeding silkworms but also serve as livestock fodder and herbal remedies in traditional medicine.
Mulberries are drought-tolerant once established and can be grown in a wide range of soil types, making them highly adaptable to Nigerian agricultural zones.
Planting Season for Mulberry
Mulberry is best planted at the beginning of the rainy season in Nigeria, typically between March and May, depending on the region.
This timing ensures that the young plants receive adequate moisture for root establishment without the stress of prolonged dry spells.
For farmers in southern Nigeria, where the rainy season begins earlier, late March or early April is ideal.
In northern regions, where rains start a bit later, planting may commence around late April to May.
Planting Mulberry
Successfully cultivating mulberry in Nigeria involves several stages, from selecting the right site to proper care and maintenance.
Here’s a breakdown of each essential step:
Step 1: Choose a Location
Mulberries require a sunny location with at least 6 hours of direct sunlight daily.
Choose a well-drained spot with fertile loamy soil.
Avoid waterlogged areas, as standing water can damage the roots and increase the risk of disease.
Although mulberries tolerate a range of soils, slightly acidic to neutral soils (pH 5.5–7.0) are ideal.
Ensure the location is accessible for maintenance and eventual harvesting.
Step 2: Land Clearing and Preparation
Clear the chosen land of all weeds, bushes, debris, and stones.
Use hoes or mechanised tools depending on the farm size.
Loosen the soil by tilling to improve aeration and root penetration.
If the soil is compacted or nutrient-poor, incorporate organic compost or well-rotted manure into the top 15-30 cm of soil.
Make raised beds or ridges in flood-prone areas to improve drainage.
Spacing: For mulberry trees planted for fruit production, maintain a spacing of 3m x 3m.
For dense plantations or fodder production, closer spacing like 2m x 2m may be used.
Step 3: Means of Propagation
Mulberry can be propagated through:
- Seeds
- Stem cuttings (the most common and reliable method in Nigeria)
- Grafting and air-layering (less commonly used but effective for certain varieties)
For fruit production, stem cuttings or grafted plants are preferred because they produce faster and maintain the parent plant’s characteristics.
Step 4: How to Plant Mulberry from Seed
Although stem cuttings are more popular, here’s how to plant mulberries from seed:
- Seed Collection: Collect ripe mulberry fruits, mash them gently, and separate the seeds from the pulp. Rinse the seeds in clean water.
- Pre-treatment: Soak seeds in water for 24 hours to soften the seed coat and speed up germination.
- Nursery Preparation: Fill seed trays or polythene bags with a mix of loamy soil and compost. Sow the seeds 1 cm deep and lightly cover with soil.
- Germination: Place the nursery in a semi-shaded area. Water lightly and regularly. Seeds germinate within 14–28 days.
- Transplanting: Once the seedlings are 15–20 cm tall (usually 8–10 weeks old), transplant them to the prepared field during the early rainy season.
Note: Seed-grown plants may take longer to bear fruit (up to 3 years) and may not retain all qualities of the parent tree.
Step 4b: How to Plant Mulberry from Stem Cuttings
- Select Healthy Cuttings
Choose healthy, disease-free, and mature mulberry branches from a productive tree.
The best time to collect cuttings is during the dry season or early rainy season, just before new buds start to sprout.
- Use semi-hardwood or hardwood cuttings that are about 6-10 months old.
- Cuttings should be 20-30 cm long and about the thickness of a pencil (1-2 cm).
- Each cutting should have at least 3-5 buds (nodes).
- Prepare the Cuttings
- Use a clean, sharp blade or secateurs to make a straight cut at the base (just below a node) and a slant cut at the top (above a node). This helps you identify the bottom from the top.
- Remove any leaves or small twigs from the cutting.
- Prepare the Nursery or Planting Site
You can root the cuttings in either a nursery bed or plant them directly in the field, depending on your resources.
For nursery rooting:
- Fill polythene bags or seed trays with a mix of loamy soil and compost.
- Make a hole in the centre and insert the cutting vertically, with two-thirds of the cutting below the soil.
- Firm the soil around the base and water lightly.
- Keep in a semi-shaded area and water regularly until rooting occurs (usually within 3-5 weeks).
For direct planting in the field:
- Dig a hole about 15-20 cm deep.
- Insert the cutting so that 2 or 3 nodes are buried below the soil and at least 1 or 2 nodes are above the ground.
- Press the soil around the base firmly to avoid air pockets.
- Water immediately after planting.
4. Transplanting (If Started in Nursery)
When the rooted cuttings are about 20-30 cm tall and have strong leaves and roots (usually after 8-10 weeks), transplant them to their permanent location in the field.
- Transplant early in the rainy season for better establishment.
- Space each plant 2.5 to 3 meters apart, depending on whether it’s for fruit, shade, or fodder.
Step 5: Watering
Mulberries need consistent watering during the early stages of growth. In Nigeria’s rainy season, natural rainfall often suffices, but supplemental watering may be needed during dry season.
- First 3 months: Water 2–3 times per week if there’s no rain.
- After establishment: Water during extended dry periods, especially in northern Nigeria.
- Avoid overwatering to prevent root rot and fungal diseases.
Mulberry trees are drought-tolerant once mature, but will produce more fruit with adequate moisture.
Step 6: Apply Manure
Mulberries respond well to organic fertilisers.
Apply well-rotted manure or compost during land preparation and again 2-3 months after transplanting.
Recommended practice:
- Compost or cow dung: Applied in a circular trench around the base
- Top dressing: Add additional manure during the flowering and fruiting stage to boost yield
Maturity and Harvest
Mulberry trees typically begin fruiting 12 to 18 months after planting if grown from cuttings and up to 3 years if grown from seed.
The fruiting season in Nigeria generally falls between May and August, depending on the planting date and region.
The fruits ripen progressively over 2-4 weeks and must be harvested as soon as they turn fully red, purple, or black (depending on the variety).
Harvesting Tips:
- Handpick gently to avoid bruising
- Use clean baskets to collect fruits
- Harvest in the morning when temperatures are cooler
Yields can reach 10–30 kg per tree per year, increasing with proper care and age.
Pests and Diseases of Mulberry
Despite being hardy, mulberries are susceptible to certain pests and diseases common in Nigeria’s humid tropical climate.
Common Pests:
- Whiteflies
- Aphids
- Mealybugs
- Fruit flies
- Stem borers
Common Diseases:
- Leaf spot (caused by Cercospora spp.)
- Powdery mildew
- Root rot (due to poor drainage)
- Bacterial blight
These can affect fruit quality, reduce yield, or stunt the plant’s growth if left unmanaged.
Pest and Disease Control
To protect your mulberry crop:
- Cultural Controls
- Practice crop rotation
- Ensure proper spacing for air circulation
- Remove and destroy infected leaves and fruits
- Use resistant or tolerant varieties if available
- Practice crop rotation
- Biological Controls
- Introduce natural predators like ladybugs to control aphids
- Use neem oil sprays for soft-bodied insects
- Introduce natural predators like ladybugs to control aphids
- Chemical Controls
- Apply approved insecticides or fungicides only when necessary and follow label instructions.
- Avoid overuse of chemicals to protect pollinators and beneficial insects.
- Apply approved insecticides or fungicides only when necessary and follow label instructions.
- Organic Remedies
- Spray the garlic and chilli pepper solution to deter pests
- Use wood ash or lime to discourage soil-borne pathogens
- Spray the garlic and chilli pepper solution to deter pests
Regular monitoring is key to early detection and effective management of pests and diseases.
Conclusion
Mulberry cultivation is a rewarding venture in Nigeria, offering multiple benefits from fruit production to animal feed and potential income generation.
With the right approach, starting from site selection to propagation, watering, fertilising, and pest control, you can enjoy healthy yields within a short time.
Whether you’re a home gardener or an agro-entrepreneur, planting mulberry is a fruitful investment worth considering.
By following the steps outlined in this guide, you can establish a thriving mulberry plantation that contributes to food security, nutrition, and economic empowerment.
Hope this article was helpful.